Fibonacci numbers are an interesting mathematical idea. Although not normally taught in the school curriculum, particularly in lower grades, the prevalence of their appearance in nature and the ease of understanding them makes them an excellent principle for elementary-age children to study.
Have you ever pulled the petals off of a daisy? If you look closely at the center of a daisy, you will find that the yellow center is not solid. It is made up of sets of spirals that go out from the center. It’s not just daisies! Nature is all about math.
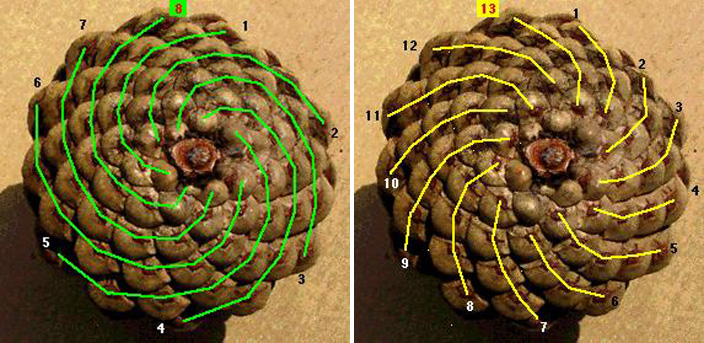
Look at the pictures of a pinecone. It has those same kinds of spirals. They don’t go around and around in a circle — they go out like fireworks. Look at the pictures below to see what that looks like. How many spirals go in the clockwise direction (green lines)? How many spirals go in a counter-clockwise direction (yellow lines)? Isn’t that strange? Wouldn’t you expect that they would be the same?
To understand the spirals in pinecones, pineapples, daisies and lots of other things in nature, we have to meet a mathematician named Leonardo de Pisa. Most people call him Fibonacci (pronounced fib-o-nawch-ee). About 800 years ago, he wrote a book in which he included a math problem that went like this:
“A certain man put a pair of rabbits in a place surrounded by a wall. How many pairs of rabbits can be produced from that pair in a year if it is supposed that every month each pair begets a new pair from which the second month on becomes productive?”
(Liber abbaci, pp. 283-284)
(Isn’t it weird that they had word problems 800 years ago?) Fibonacci’s work on this problem led him to this sequence of numbers:
0, 1, 1, 2, 3, 5, 8, 13, 21, 34, 55, 89, 144 …
Can you figure out what the next number in the sequence will be?
We call this the Fibonacci sequence, and the numbers are called Fibonacci numbers. To get the next number in the sequence, you add the previous two numbers together. Now go back and look at those pinecone spirals. What do you notice about the number of spirals in each direction, now that you know about Fibonacci numbers?
Now that you know what Fibonacci numbers are, you’re ready to go on a Fibonacci hunt.
Flowers
Look at this flower (it’s a Blizzard Bay daylily, image courtesy of Barossa Daylilies). How many petals does it have? Do you see six? Are you thinking that six is not a Fibonacci number? Look more closely. Do you see that there are really two sets of three petals? The outside petals with the straight edges are not really petals. They’re called sepals. So how many actual petals are there?
Not all flowers have three petals. Some have lots more. Some are hard to count because there are so many petals or they are in rows. And there are a few flowers that don’t have Fibonacci numbers for petals. See if you can find a drawing of a daisy. Are the petals a Fibonacci number?
Seed heads
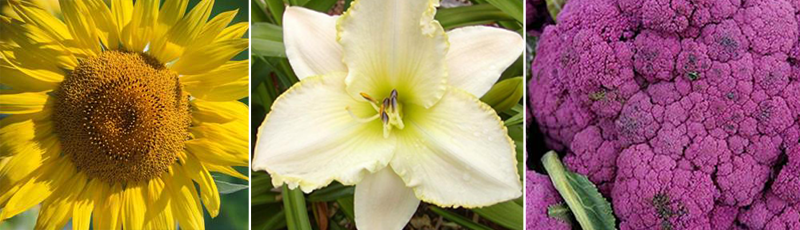
The seed heads of flowers are in Fibonacci sequence spirals like you saw in the pinecones. Look at the seed head of this sunflower. Do you see how packed in the seeds are? But none of them gets smashed. The spiral pattern lets the flower fit the most seed heads in the least space.
How do you think you could use this information in your life? Do you think it would work to try to pack a suitcase like this? Why or why not?
Food
Look at this picture of a purple cauliflower. If you look carefully, you can see the center of it where the little flowers (florets) begin.
Can you see the spiraling?
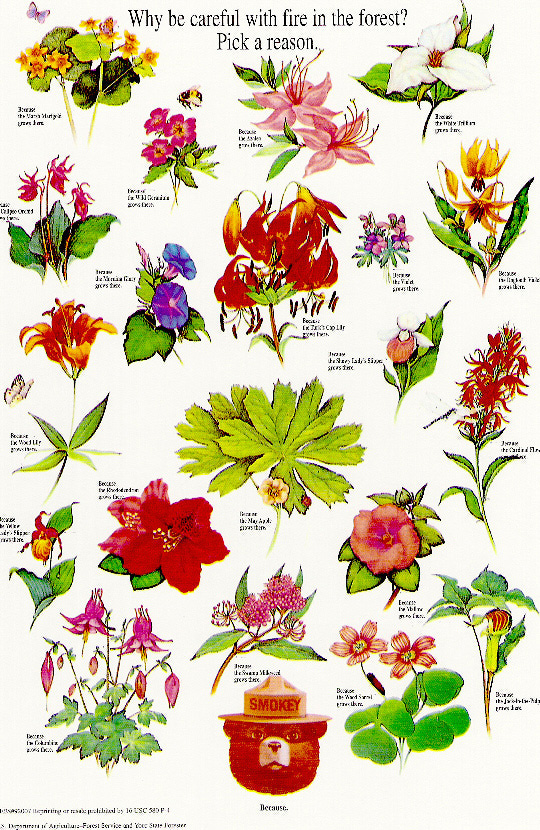
Nature is full of Fibonacci numbers and the Fibonacci sequence. Look at this Forestry Service poster of wildflowers. How many examples of Fibonacci numbers can you find in the poster? (Don’t worry that the words are fuzzy; just look at the pictures of the flowers.)
Fibonacci Rectangles
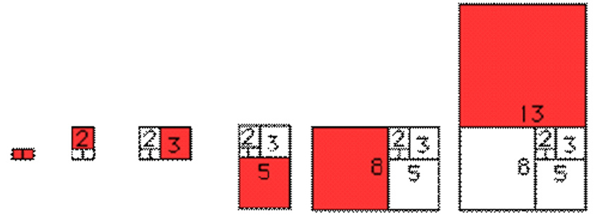
Let’s draw some rectangles using Fibonacci numbers. This will take us to an amazing place. Complete the Fibonacci sequence below (try to do it without help!):
0, 1, 1, 2, 3, 5, __ , __ , __ , __ ,
Great! You’re ready to start. First, we’re going to do an easy one using graph paper.
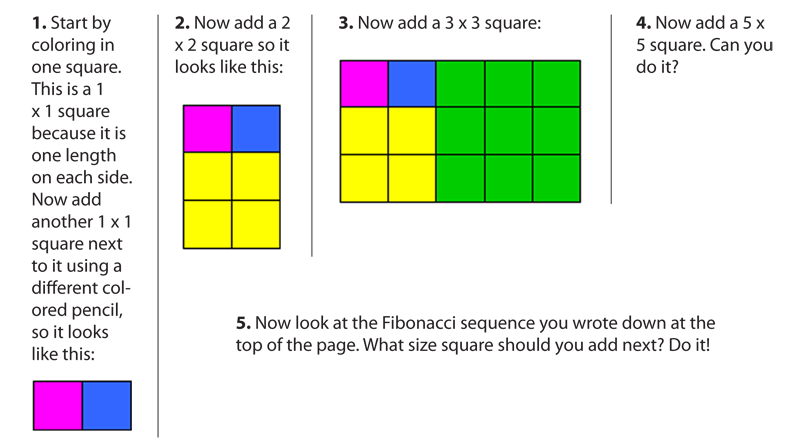
The interesting thing about making rectangles like this is that the ratio (the number that shows how the sides relate to each other) stays the same, no matter how big the rectangle gets. This ratio gives us rectangles we call the “Golden Rectangle” because they are said to be the most beautiful rectangles to look it. The ratio is called the Golden Ratio. You can find it by dividing the long side by the short side. So if you have a rectangle that is 3 × 5, you would divide 5 by 3. This will give us a number right around 1.61. (Learn more about the Golden Ratio.)
Can you find some Golden Rectangles around you? How about this piece of paper?
Now you are going to create a Golden Rectangle on your own (on your large piece of paper, not the graph paper) and see something really amazing!
Now, with your compass, make an arc in the squares with a radius the size of the edge of the square. Don’t get nervous about these big words; they just mean that the arc will be one-quarter of a circle. The arcs in the first squares will be really, really tiny. But look how they grow!
Look at this picture of a nautilus shell. What do you notice?

Art Connection
Now look at this painting by Mondrian:
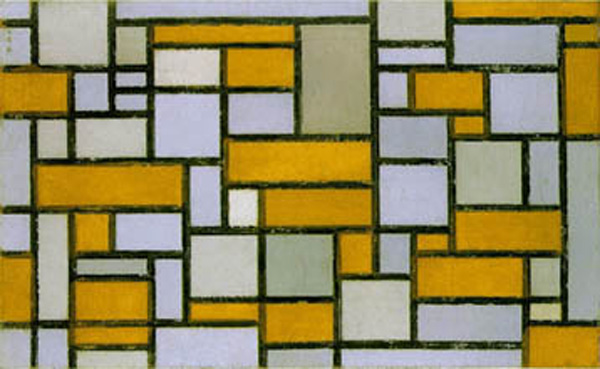
What connections do you find between what you drew and what Mondrian painted? Do all of his rectangles look like Fibonacci-based rectangles to you?
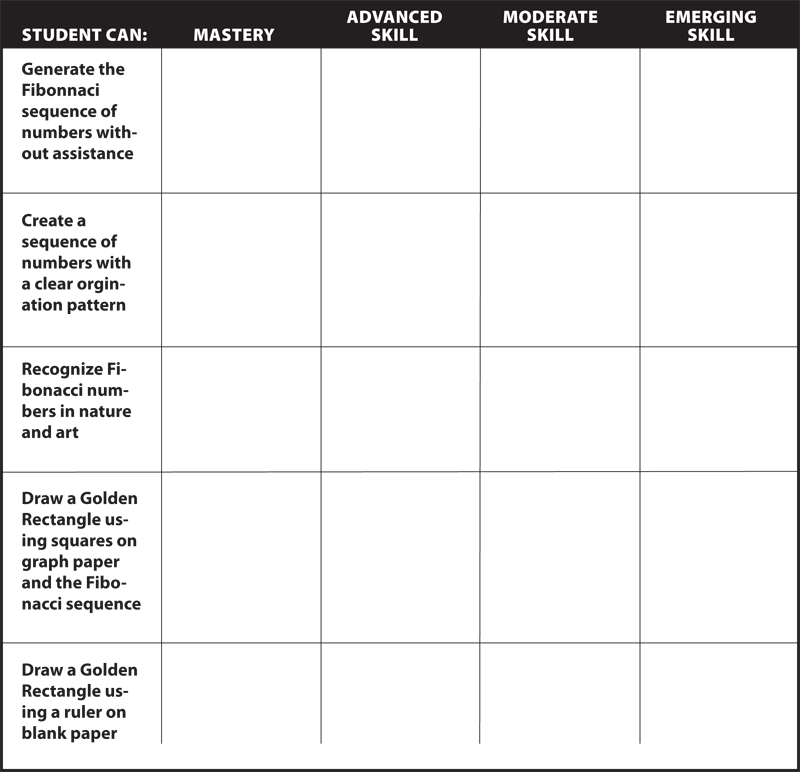
This series of lessons was designed to meet the needs of gifted children for extension beyond the standard curriculum with the greatest ease of use for the educator. The lessons may be given to the students for individual self-guided work, or they may be taught in a classroom or a home-school setting. Assessment strategies and rubrics are included at the end of each section. The rubrics often include a column for "scholar points," which are invitations for students to extend their efforts beyond that which is required, incorporating creativity or higher level technical skills.